Mum Little LOVES!

My Life and My Loves!

  • ABOUT
  • CONTACT / COLLABORATE
    • Product styling and photo packages
    • Testimonials
    • Boffice
    • Early Settler – Tropical Vibes EDM
    • Cottages & Bungalows
    • ‘How far would you go to be Insta-famous’ / VAMP article
    • Early Settler – EDM
    • ‘A study Space she’ll love’ collaboration with Pottery Barn Kids.
    • Little Loves X Dwell Store
  • MY HOME
    • Home Beautiful – Dec 2023
    • Home Beautiful – July 2023
    • HOLIDAY DECOR magazine
    • Our home in Queensland Homes magazine.
    • Home Beautiful Magazine – Jan 2015
    • My home on Reno Addict.
    • My home on Glamour Coastal Living
    • Figs & Feta feature
    • @qweekendloves
    • Early Settler Home Life feature, August 2020

Ready in 45 secs with Tefal

July 9, 2020 by Hayley Leave a Comment

I’m ‘all in’ for anything that makes my life easier or more productive. I know many of you feel the same so I thought it was my responsibility to share this with you.

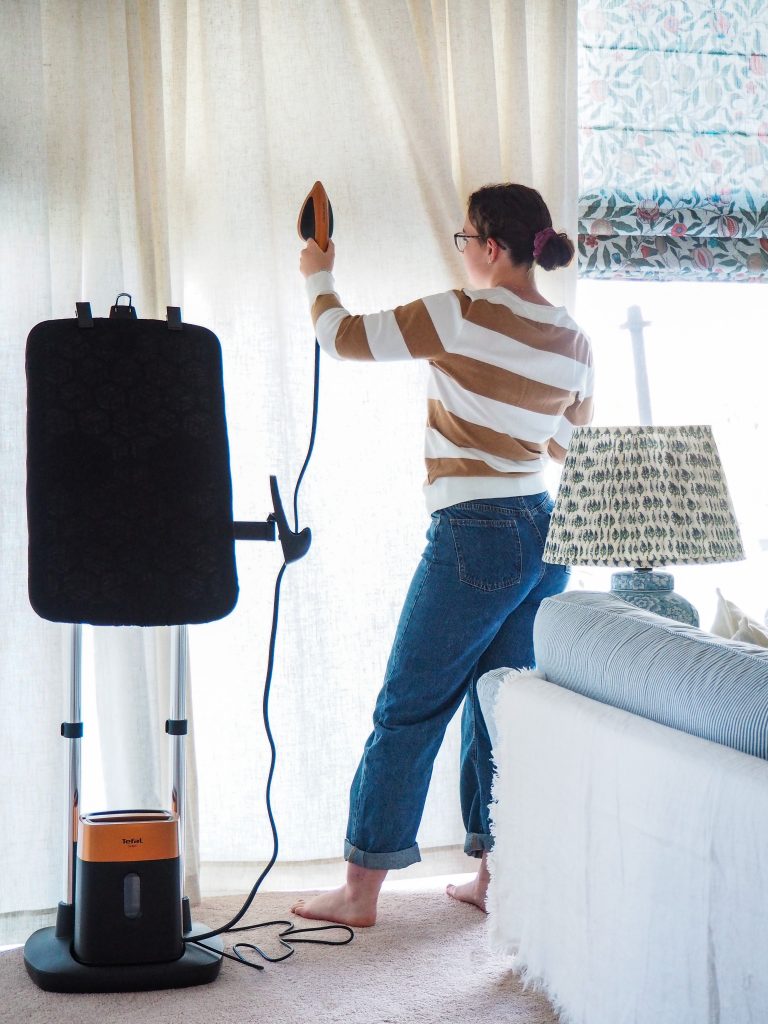
I recently got my hands on the Tefal IXEO All-in-One iron and steamer, thanks Tefal! It’s one of those things that you don’t know you need until you get it. I wasn’t sure if I would use it for much more than ironing clothes, but I actually reach for it a few times a week, it heats up in just 45 seconds so it’s great for a quick touch up.

Let’s start with ironing clothes, this is not like any regular iron. Firstly, there are no settings, it uses intuitive technology to adapt to the the correct temperature to care for your garments. The iron head is super light, about half the weight of a regular iron and it glides over your clothes effortlessly.

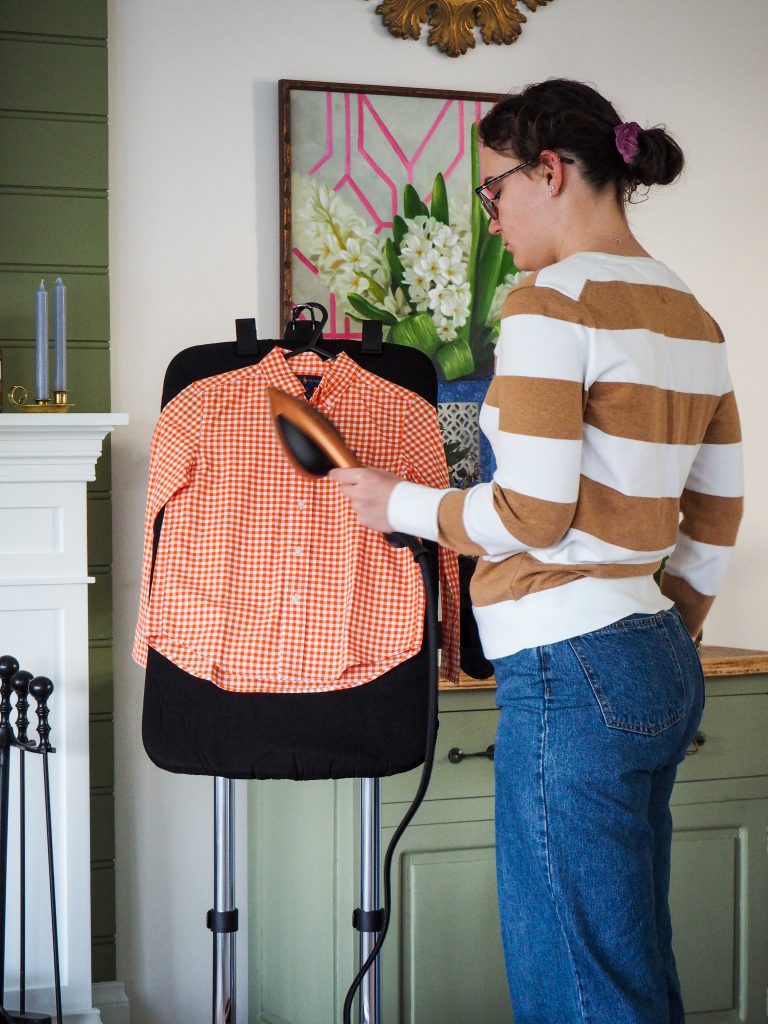
You don’t need a traditional ironing board anymore, which is such a great space saver. You can still choose to iron the traditional way with your Smart board set horizontally, or you can do it at an ergonomic angle or vertically, which is great for steaming, oh and it’s also height adjustable. I’ve found the easiest way to iron business shirts is by putting them on a coat hanger and hanging it from the top of the board vertically. The iron just glides over the fabric and releases all the creases instantly.

Here’s a few things other things I’ve used my Tefal IXEO for in just the last couple of weeks.

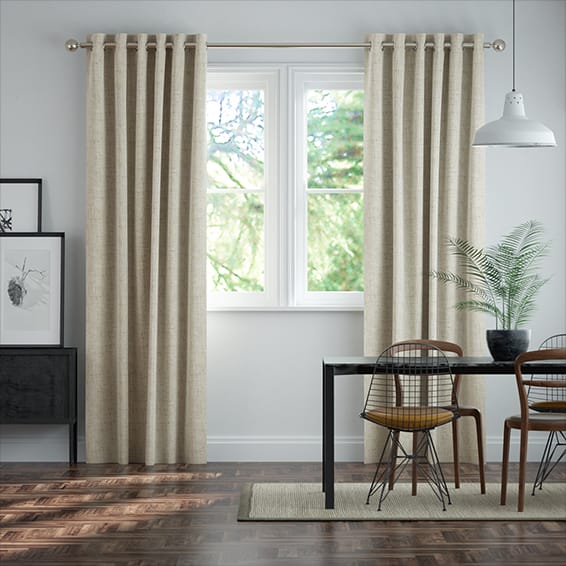
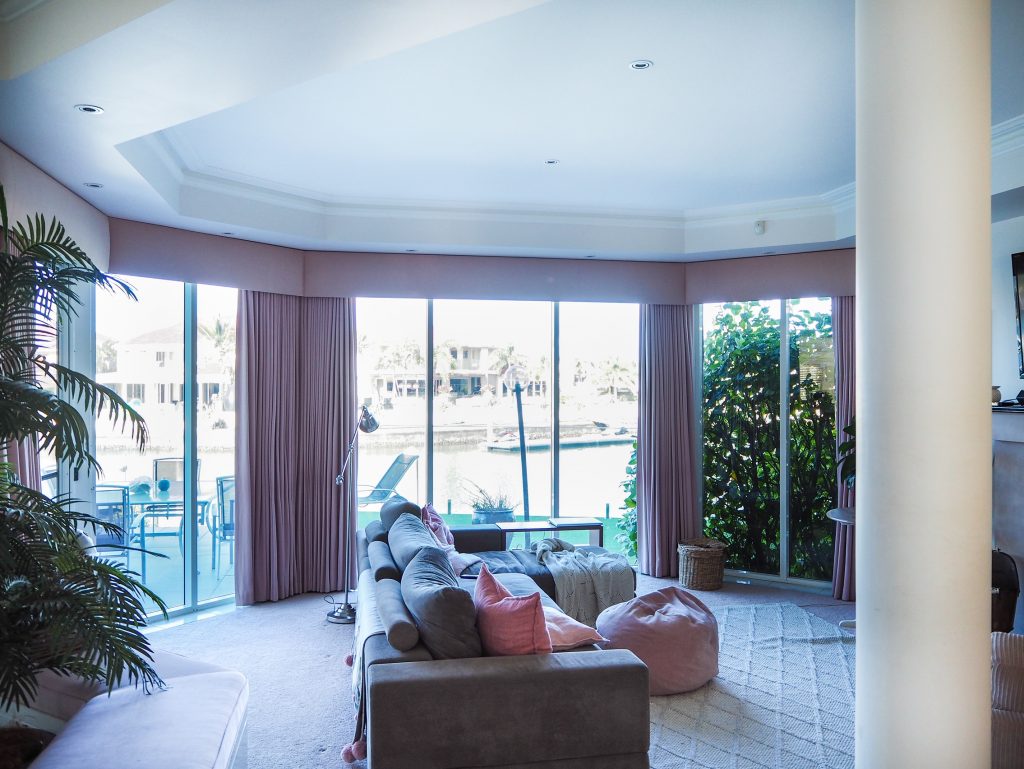
Curtains! Anyone who has struggled with the masses of fabric in curtains on an ironing board will understand how fabulous this is. We steamed them while they were hanging, it was so much easier and the bonus of doing it with steam is that you are also giving your curtains a quick refresh, eliminating any odours and killing germs and allergens.

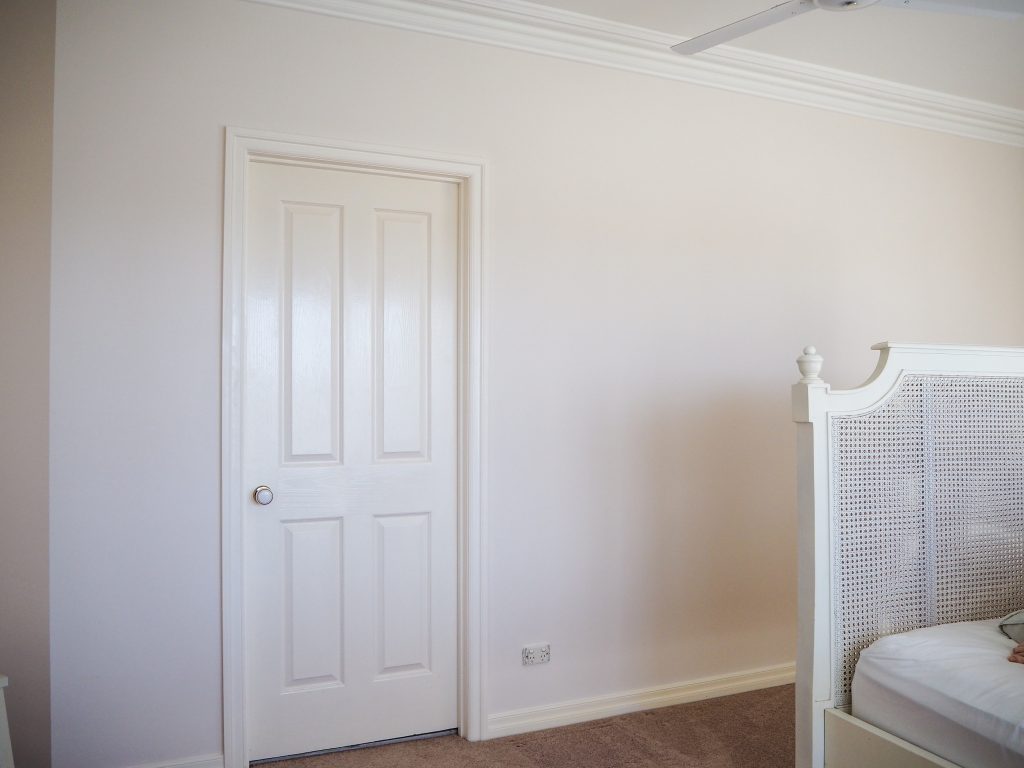
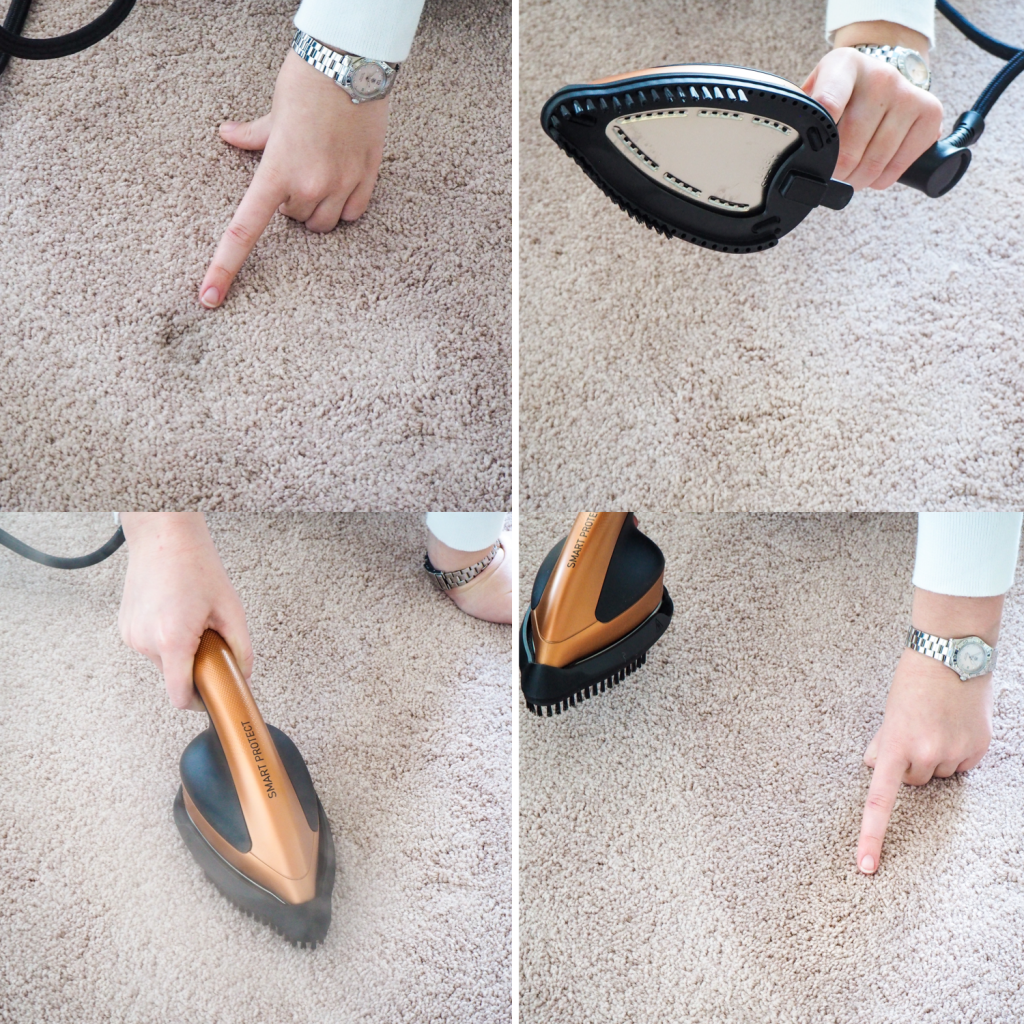
Next, this awesome idea was from one of my lovely IG followers. I removed those annoying old furniture marks in the carpet with steam! As most of you know, we moved into a new house recently, the carpet has lots of pressure marks left from the last owners furniture. It’s where the carpet has flattened down in one spot and no amount of vacuuming will bring it back.
I clipped the fibre brush onto the iron head and brushed the carpet fibres up as I steamed. So easy, it took a minute or two and you can’t even tell where it was.

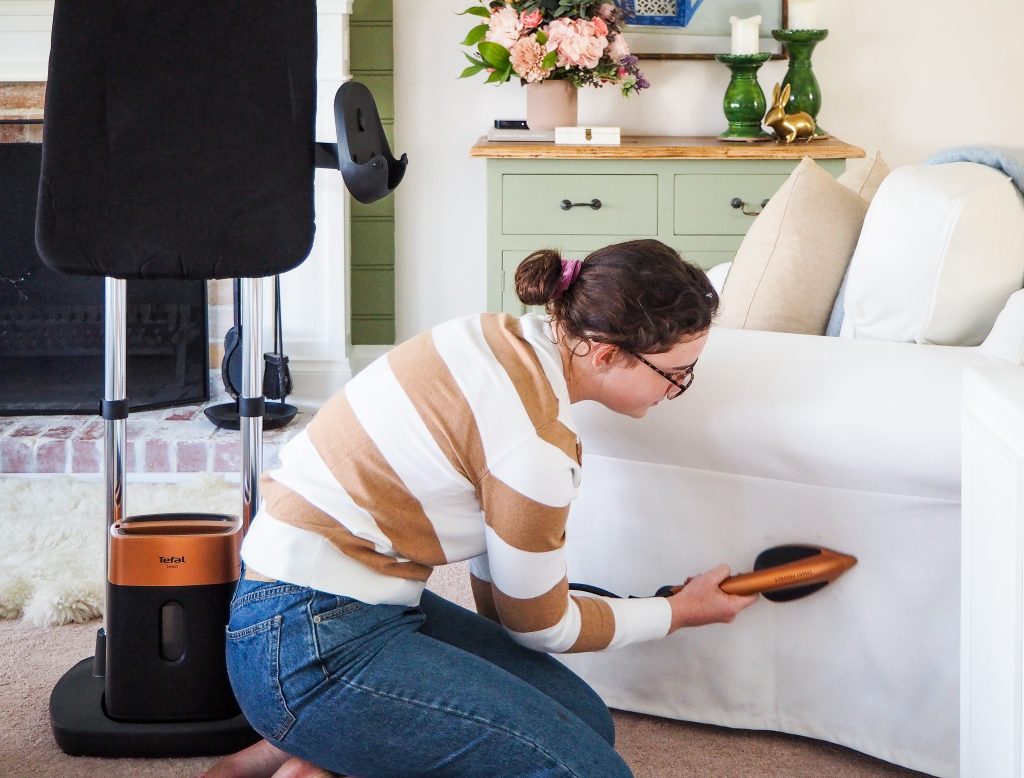
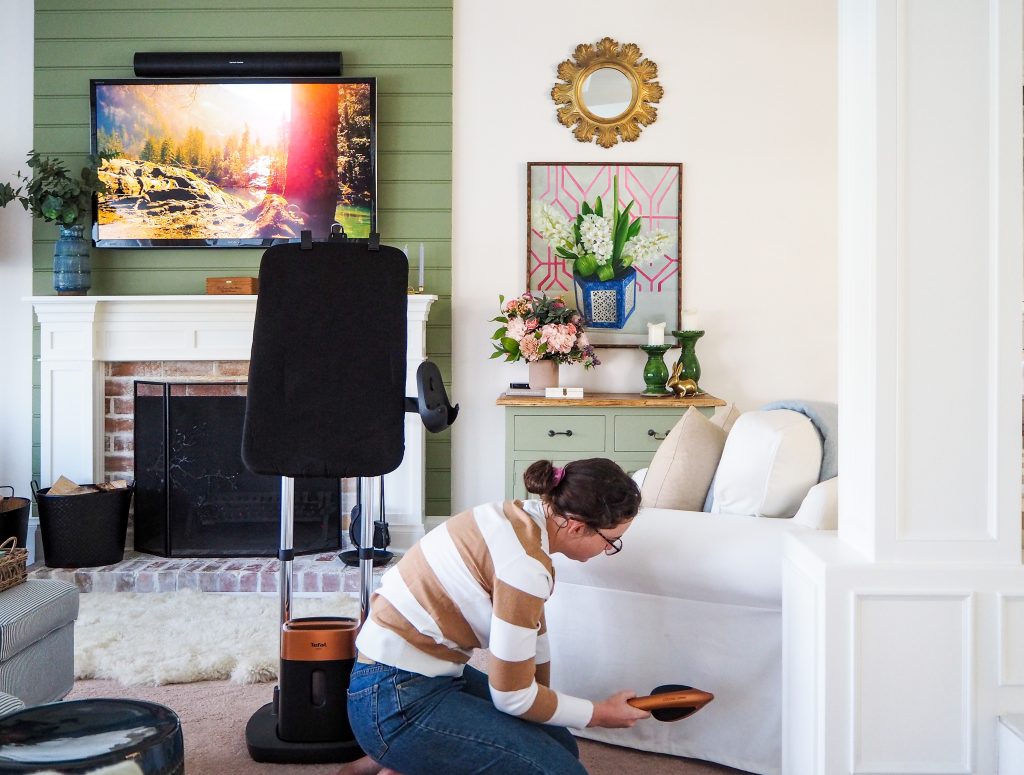
 Lastly, and probably one of my favourite things about the Tefal IXEO is ironing or steaming textiles directly on the furniture, things like fabric sofas, dining chair seats, upholstered bedhead and bed linen while it’s on the bed. This is a stylist dream!
I removed the wrinkles from my armchairs loose cover and it looks amazing.

Next on my list is to iron my sheets, pillowcases and quilt covers while they are on the bed.
Oh, and just so it’s extra easy, you can also detach the main unit and steam head from the stand and move it around as a portable unit!

You can find yours here.

Happy steaming!

Hayley x

Fun Felt Pennants

June 19, 2020 by Hayley 1 Comment

I’ve been scrolling Pinterest again looking for ideas for Orly’s bedroom.
I really like the ‘summer camp’ style and I noticed one component that was in many of the rooms I loved … felt pennants.

Source : Miss Mustard Seed
Source : Curious Details

Vintage pennants are hard to come by, especially in Australia, so I decided to have a go at making them myself. I knew my Cricut Maker would be up to the task so I started designing them in the Cricut Design Space and came up with a few designs I liked.

I managed to get my hands on a some Cricut Felt, but you can use any felt, just make sure you choose the right settings when you create your design. Some parts of my pennants aren’t exactly the same colour as my design, but that’s the great part about the design space, you aren’t locked in to anything and can change the colours on your mat as you go with whatever you have on hand.

I used the pink FabricGrip mat to secure the felt.

OLYMPUS DIGITAL CAMERA

I used the rotary blade.

The felt peels off the mat easily and there is no need for tools to remove it.

After my creation was cut it was as easy as assembling the pieces and glueing them together with craft glue.

OLYMPUS DIGITAL CAMERA

I laid them all out before glueing them just to make sure I was happy with the colours and spacing.

I used craft glue and layered up the elements until I was happy with the results.

I think they look amazing!

This is where I would usually show you what they look like hanging in Orly’s room.
Unfortunately, I have fractured my leg and am in a full leg brace and crutches … climbing up on Orly’s bed to hang them along the window ledge above his bed doesn’t seem like a very good idea right now.
Stay tuned though and I’ll show you as soon as I’m back on my feet, in fact I think his whole room is due for a mini makeover. I’ve got lots of time to  plan right now!

If you’d like to make your own pennants, you can find my design here.

Happy Crafting!

Hayley x

Blinds (and curtains) Online

June 14, 2020 by Hayley 1 Comment

Would you be happy to live naked, completely exposed to the world at all times?
What about a sheet? Would you be happy to wear a sheet in lieu of a beautiful frock?
Of course not!

Then why do we leave our windows stark naked and expose our lives to the whole world with no privacy?
Then we decide we need privacy ….. so we staple ugly old sheets up on our windows, is that look you are trying to achieve?
In my case the ugly sheets may have been a better option, I inherited these putrid pink curtains with our new house, I say putrid not because of the colour but because I’m pretty sure they had been hanging there for 20+ years, and I’m pretty sure they had never been cleaned, they were PUTRID! They were also very heavy and dark and I had no option to control the light in the room other than open or closed. They made the room feel dark, dated and dirty.

Some of us live with our current situation because window coverings can be tricky, the options are endless and confusing and we don’t know where to start. Or maybe you decided to take the plunge and got a a local curtain maker around for a quote and were blown away by the price. Or maybe you got savvy and decided to order them online but the process of ordering and hanging them yourself was a little overwhelming.

I’ve done the research, got the quotes and made the mistakes, now I’m here to share all my tips for getting the perfect window treatment at the best price without the hassles and headaches.

Your first step is deciding what type of window covering you would like in your space.
You need to consider both practical and functional elements, as well as the decorative factors of how it will make your room look and feel.

Lets talk about practicality and functionality.
Think about your natural sunlight or light from other sources like street lights or adjacent building. How much you do you want to control it? Do you need a full blockout, or do you want to filter the light? Also consider which way the window is facing, the sun can be harsh in Australia and choosing the right lining can help you with heat and energy efficiency.

energy-white-68-roller-blind-1
Sunscreen Roller Blind

Often a bedroom will require a sheer for privacy and a blockout for sleeping, this can’t always be achieved with one layer and you might need to consider a blockout blind with a sheer curtain, or a blockout curtain and a sheer curtain, or a double blind.

Double Roller Blind

What other elements do you need to consider in this space? If it is a bathroom you might need to consider water and condensation and choose a material that can withstand the moisture.

Honeycomb Blind

Next, think about your furniture placement. Are you putting a piece of furniture under a window? In that case I would choose a blind, curtains never fall nicely if they are tucked behind a piece of furniture, and sill length curtains don’t give you the same impact a beautifully made roman blind or classic plantation shutters will.

washington-still-blue-36-roman-blind-1
Roman Blind

Lastly, where are you going to hang your window coverings and/or stack them? Do you have room to hang a curtain rod above your window? If you don’t have room above your window, can you hang curtains from the ceiling, or can you fit a blind recessed inside your window architrave? Do you have space to stack your curtains to the side? If you chose a plantation shutter, have you got room to open it to access the window?

sherbrooke-cool-white-80-shutter-blind-1
Plantation Shutters

Now lets talk about the look you want to achieve and how to choose fabrics and colours.
What is your decor style? Do you want your space to feel casual and relaxed or would you prefer a more tailored and formal look? Some types of window coverings work better with certain styles than others, for example, a floral curtain would be perfect in a cottage, but probably not in a sleek and modern highrise with minimalist style. It would take me days to go through all the different styles and options available, I would suggest popping on to Pinterest and finding your style, then have a look at the window treatments that are used in the rooms you love.

compton-china-blue-36-curtain-1
Pinch Pleat Curtains

Often larger rooms with large windows look beautiful with curtains and smaller rooms benefit from the more streamlined look of blinds, but this isn’t always the case and each room needs to be considered individually. Maybe you have an tiny window with an amazing outlook, curtains are a great way to frame your view.

Curtains framing a small window

When you are choosing your fabric and colours consider what other elements are already in the room, things like floor coverings, paint colours or wallpaper and existing furniture. Remember, you don’t have to create a matchy matchy space, but you want all your colours and patterns to compliment each other. If in doubt, choose a beautiful sheer curtain or neutral fabric, they are timeless and won’t date.

wave-fold-tahiti-voile-snow-36-s-wave-1
S-Fold Sheer Curtain

Lastly, don’t forget to consider what your house will look like from the outside? You might prefer all your window coverings to be the same colour from the front of your home, or it might not matter to you at all.

When I finished my research and I was confident I would make the right decisions, I took the plunge and ordered my curtains and blinds for my living room from Blinds Online.

Here’s the thought process I had for my space.
It’s a tricky bay window, very large and high with multiple 135 degree angles and minimal space at the sides to stack my curtains.

BEFORE – the putrid pink curtains!

I wanted to filter the light, and would usually choose a sheer but I ruled this out as I didn’t want to block the view. The window faces East and gets the morning sun for a short period of time, I decided a roman blind would be perfect as I can lower them enough to block the sun but not close of the window entirely. We also have a fireplace in this room and I wanted it to feel cosy in the winter, so I added a curtain to layer over the blinds. Having two layers gives me the ultimate choice to control the light from partly blocked with the roman blind to nearly full blockout if I close both the blind and curtains. You can choose from S-fold, Eyelet, Pencil Pleat or Pinch Pleated curtain headings, I chose the pinch pleat for this room for it’s classic and tailored look.
I chose to recess fit the roman blinds as the windows are very high and it will only block the light I want it to block.
The curtains will be ceiling hung on a simple rod I had bent to mimic the shape of my window as this gives me the cleanest, most streamlined look and doesn’t detract from the beautiful roman blinds. I know I’m ignoring my own advice as I don’t have space at the sides to stack the curtains back on the walls, but as I also said, each room is individual and some rules need to be broken, especially when you are dealing with a tricky window.

Roman Blind – V&A William Morris Fruit, Autumn

As for fabric choices, I knew I wanted something fun, but also timeless and I wanted to add colour without it being too bright or overwhelming. I saw the Blinds Online  collaboration with V&A featuring the range of William Morris fabrics and I knew this was something I would like. I popped online and had a browse. I instantly fell in love with a fabric called Fruit (AKA as Pomegranate) in the Autumn colour palette. I knew I had to use it, but things often look different on your computer screen than what they do it person, so I ordered a few samples. You can order up to 10 samples for free to help you choose at home from Blinds Online. I knew I was having a roman blind and a curtain so I also ordered a few plain fabric samples for the roman blind that I thought would coordinate well with one of the patterned fabrics I chose.

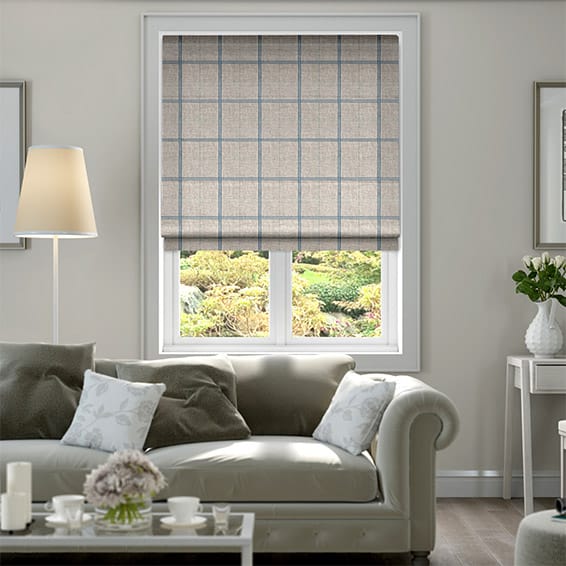
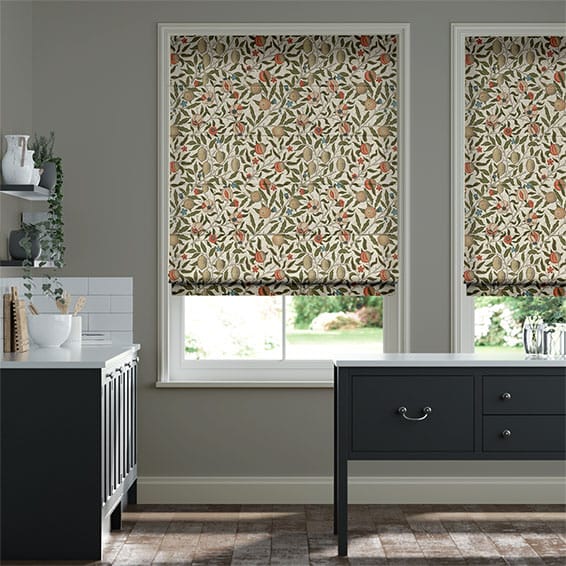
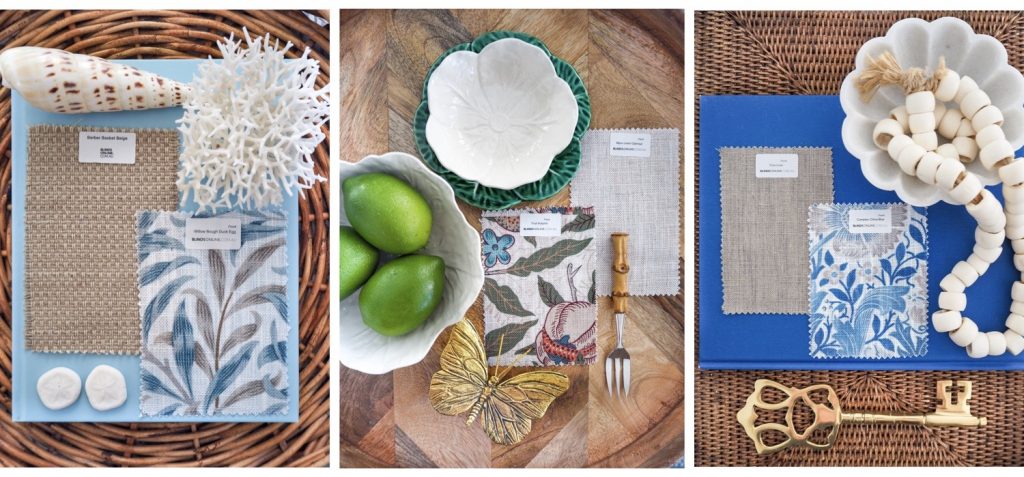
Once my samples arrived I placed them in my space and observed how they looked throughout the day with the changing daylight. I still loved the Fruit fabric and had to use it. I knew that the curtains wouldn’t get closed often in this room and certainly not during the day, but I really wanted to appreciate the full pattern of this fabric so I decided to switch up my original plan and use it as the roman blind where I could enjoy the full design more often.
Then I chose a plain Oatmeal linen blend for the curtains, It compliments the Fruit fabric and is beautifully classic and timeless.

Curtains – Bijou Oatmeal Linen

Now I knew what type of window coverings I wanted and I’d chosen my fabrics, it was time to measure up and order online. I know this sounds scary, but it really isn’t hard at all. Before you start measuring, here’s a few things to consider –
* Even if your windows are all different, try to have your window coverings all at the same height.
* Place your curtain rods high above your window and extend it out past the window so your curtains stack on the wall not on the window, but be careful not to expose any wall between the window and curtains. This will make your windows look larger and grander. It will not reduce any daylight, but it will provide a better blockout when they are closed.
* When determining the length, nearly touching the floor is ideal, Blinds Online suggest 15mm above the floor. I know we’ve all seen the images of curtains puddled on the floor on Pinterest, it looks so luxurious and glamorous, it’s hardly practical if you have kids and pets, but if you have a space it will work in, go for it!

To measure up you will need a tape measure, something to write your measurements down on and possibly a stool if you need to reach your ceiling. I also found it handy to have another person to help me hold the tape measure in place since my window was so big.
Tip : Please don’t try and use a ruler and shimmy it along to measure a large window, you want these measurements to be as accurate as possible.
Bigger Tip : Follow the measuring instructions online from Blind Online, they are the experts who have been doing this for for 46 years, and online for more than 14 years. They know what they are doing. If you take the time to read the instructions and follow them closely, you will be fine. They are written in easy to understand language with lots of pictures and diagrams to help you. They have separate instructions for blinds, shutters and curtains.

Once you’ve placed your order you can track it here.

As soon as I’ve got mine ready to go, I’ll show you how to hang them and the before and after photos.
I can’t wait, are you as excited as me?

Happy Shopping!

Hayley x

Wallpaper : Peel & Stick Vs Pasted

May 20, 2020 by Hayley Leave a Comment

I love pattern and colour.
I love the emotions of colour, I love the way it can change the mood in a room, I love the way pink takes me back to my childhood and makes me smile, or the way blue reminds me of the ocean and makes me feel cool and relaxed.
I love the playfulness and personality of patterns, I love how patterns can make me feel calm or invigorated, I love how a simple stripe makes me feel at peace, or a sprawling wall of flowers makes me insanely happy.

So why not use the largest canvas in your room to conjure all those emotions? Wallpaper is one of the most statement stealing, impact punching and cost effective ways to convert your room from boring to breathtaking.
Wallpaper has recently made a huge comeback, there is something to suit every style and the options are endless.

I recently worked with Edge Wall Art and wallpapered two rooms in our new home and I used different types of wallpaper for each room. For Bella’s room I used a peel & stick paper and for Lucy’s room I used a pasted paper. I did it myself with very minimal help from my teenager daughter. I had so many of you message me with question about how easy/hard it was to hang, which style I preferred and how long it took.

Firstly, lets talk about the peel & stick paper.

Upon receiving my paper I was pleasantly surprised by the thickness and quality, despite being called wallpaper, it’s actually a polyester type fabric. The printing was sharp and saturated and the pattern was exactly as it was represented on the website.

I took my time to read the enclosed instructions and make sure my walls were prepped and ready for the wallpaper.

We started on the left side as specified in the instructions. Its important that you start on this side as the overlap of the joins is printed to go from left to right. It is like a giant sticker and you literally peel away the backing paper and stick it to the wall, a little bit like contacting your school books.

The first panel is probably the most important as it sets up the lines for the rest of the panels. Unfortunately for me our first panel was a tricky one as it had a 45% turn in the wall and our gyprock wall finish was not very straight, that’s what you get with a 25 year old house I suppose. Despite that hurdle we managed to get it up okay and it was all smooth sailing from there.

I was pretty happy with the finish except for one panel that I didn’t get straight and the overlap pattern doesn’t line up exactly. Luckily the floral print is busy enough that it is not very noticeable. In hindsight, I should have made sure the top was straight with the ceiling cornice and in line with the pattern, then let the wallpaper fall naturally rather than try to manipulate the paper to match the pattern from the sides. In other words, I should have listened to the instructions from the professionals instead of doing it my way … *insert big eye roll at myself* … you live and learn!

So, what’s my verdict on the peel & stick wallpaper?
The sticky is pretty sticky and I did manage to get myself stuck and to also fold the paper back on itself more that once, fortunately it peels apart easily and can be removed and re-stuck multiple times until you get it right. I also have a few tiny air bubbles which I didn’t notice while I was hanging it, they can only be seen at night time with the lights on, I could probably fix them but they are so small and hardly noticeable so I’m going to leave them alone.
It took me about 2-3 hours to hang this paper.
The peel & stick is great for renters as it can be removed easily, and also for people who change their mind often like me!

Now, lets look at the pasted wallpaper.

When this wallpaper arrived I instantly fell in love. Sometimes I am hesitant buying things online because the colours can look different, and I took a risk with this one and didn’t order a sample first, but when I opened it I was so excited and couldn’t wait to hang it. The pasted paper is actually a paper, not a fabric, it is thick and the colours are rich and beautiful.

Again, read the instructions and makes sure your walls are clean and suitable for wallpaper.

Lucy’s wall was easy peasy, straight across without any weird angles. I used a laser level in this room to make sure my lines were straight and to show me how far I needed to paste the wall for each panel. I used a roller and applied the glue generously enough to get a good even coverage. Again, we started on the left side.

This paper is also printed to overlap from left to right like the peel & stick. Once it is hung you can choose to leave the overlap or you can choose to do a double cut, which is what I did. It sounds scary, but it really is quite easy, you just use a razor blade or knife and run down the join making sure you are cutting through both layers of paper at the same time. Then you remove the excess strips from both panels and your cut lines will line up perfectly.

It hung like a dream and was quick and easy. The finish is perfect, I managed to get this up without any bubbles, the patterns line up and the edges are straight and even.

My thoughts on the pasted paper? I found it much easier to hang, I think taking the sticky factor out of the equation gives you the extra ability to move it around and get it straight, you can actually slide it around the wall a little to get it perfect. It is however, a little bit messier, excess glue will be pushed out the side as you smooth out your paper and you should have a damp sponge to clean it up as you go. It does require the added steps of rolling the glue on the walls and cleaning it off at the end. It took about 3-4 hours to hang and clean up.

So which do I prefer?

This seems to be a really personal decision and people really love one or the other. While they both have their advantages and you will end up with a beautiful wall with both options,  I prefer the pasted wallpaper. I am not a professional and I found the pasted paper easier to get a perfect finish. Although I wouldn’t rule out using peel & stick again, I would chose pasted if I had the option.

Luckily, Edge Wall Art have both options available.
If you’re keen to have a go at wallpapering, I’ve got you!
Use this discount code – use ‘mumlittleloves’ for 10% off at Edge Wall Art (valid until 1st June in Australia only).

Happy Wallpapering!

Hayley x

« Previous Page
Next Page »

WELCOME!

I'm Hayley.

I'm a Mum to 3 gorgeous kids and wife to a builder. We are serial house renovators and we have just embarked on our 9th home renovation.

I love decorating with blue and white and pops of pink or green. I love country and coastal style and I've never met a spot or stripe that I didn't like.

I believe in splurging & saving, practicality & pretty and keeping it real.

Please follow & like us :)

Follow by Email
Facebook
Facebook
fb-share-icon
Twitter
Post on X
Pinterest
Pinterest
fb-share-icon
Instagram

Search Mum Little Loves.

Hayley Little in Gold Coast, QLD, AU on Houzz

Copyright © 2025 · Beautiful Pro Theme on Genesis Framework · WordPress · Log in