I know, I know, this is the world’s longest kitchen renovation and I have had so many e-mails asking where I bought things, why I chose certain products and how I planned all the details.
Hopefully I can answer all your questions in the next couple of posts.
Firstly, let’s have a look at the kitchen before …


These are the real estate photo’s from when we bought the house, trust me those photographer’s know how to make it look good, It doesn’t look too bad in these photos.
In reality it was very small, so small in fact we couldn’t get our fridge into the kitchen through the opening between the wall and edge of the bench where the (stripper) pole is. The boys had to lift the fridge up and over the bench top to get it in.
The colour was actually quite yellow, especially the bench tops, I’m not sure what type of stone they were but the colour was a light shade of baby poo yellow, ew!
To use the oven I had to open all 6 drawers to the sides of the oven otherwise it would overheat and turn itself off. The microwave turntable would just start turning randomly all by itself. The dishwasher left the dishes dirtier than when we put them in. And the garbage disposal wouldn’t drain so if by accident any water went down that side of the sink we would have to ladle it out.
Yes, that’s what I lived with for a year, so the prospect of a new kitchen had me giddy.
The planning began …
I spent way too many hours on Pinterest pinning pictures of my dream kitchens, looking at every detail from the layout, to the cupboard profile, to the tap style. Unfortunately I could never achieve the layout I wanted in the space I had to work with, so I made sure that I got all the other details right.
When I looked at all the kitchen pictures I pinned I noticed a very consistent style and even though I wanted to be brave and go for something colourful and different, I knew I would be happy for years to come if I stayed true to the style I have loved for ever … white cupboards, Carrara marble and nickel hardware. I also knew I could add pops of colour with my accessories and change it up as my mood changes (often).
That was the easy part, the hardest part of this kitchen was the layout. Renovating is so much harder that building, you have to work within the boundaries that are already set and find ways to make a space feel bigger without actually gaining any floorspace.
We decided to rip out as much of the kitchen as we could before we’d even planned the new one. We knew it would make a big mess and mean we would be without a kitchen for much longer than needed, but we wanted to see how much space we could reclaim and needed to see what was in the ceiling in the way of structural supports.

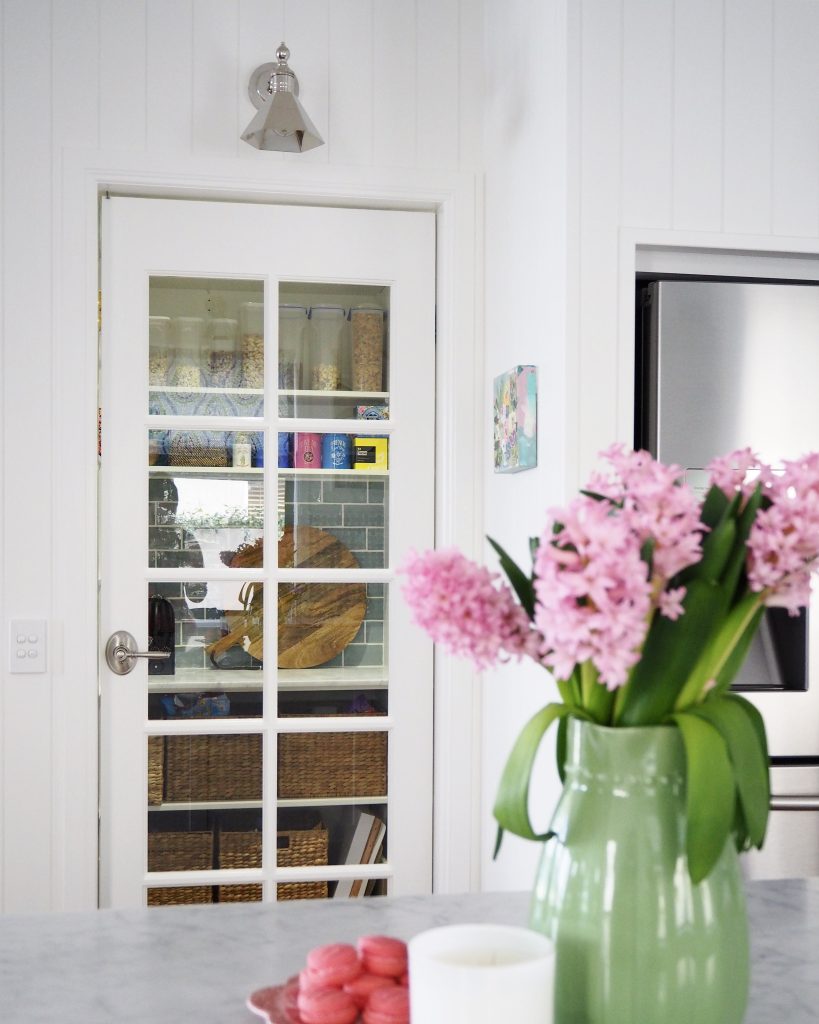
I had a little bit of extra room available under the stairs, you can see the door to the space above, unfortunately it wasn’t high enough to be opened right up, but I was able to make an opening big enough to push the refrigerator right back in there. I also had a little area that was previously being used as a small desk area, above to the left of the kitchen, while it wasn’t very big, it was the perfect size to squeeze in a small walk-in pantry. By claiming those two small spaces that were previously not part of the kitchen I gained much needed floorspace and made enough room for an island bench which I really wanted.
I knew that the kitchen layout that was originally there didn’t work. It was a U shape with a big useless dance floor of space in the middle. I wanted to open the kitchen to the living area and give it more than one entry point. An island bench made sense. I couldn’t fit one in running parallel to the living area which is how you see most island benches situated, so I decided to run it adjacent to the living space. This decision wasn’t easy, I had more than one person tell me it would look weird, including a couple of cabinet makers. I taped out every layout I could think of on the ground, nothing else worked in this space, so I stuck to my idea.
So, I had my plan, I knew what finishes I wanted, next step was to find a cabinet maker who could see my vision and work with me. If you’ve followed me for a while you will remember we built a dry bar area not long ago, while the cabinet maker there did a good job I felt like he didn’t understand my style. I went through the process of getting quotes from quite a few cabinet makers until I found one (through a recommendation from a builder friend) that just ‘got me’. He wasn’t the absolute cheapest and his lead time was probably one of the longest, but he knew what I wanted and I was confident in his ability to deliver a beautiful kitchen.
The process …
We demolished the kitchen ourselves, it saves money and I’d rather spend the money on pretty things!
We had everything framed up in the new layout, we gained about a metre by pushing the fridge in under the stairs and it was great to finally gets feel for all the new spaces.
We lined the exposed walls and ceiling with VJ board, I love the character they add to a home and since we used them in the dining room I wanted to connect the spaces with a few elements. We added a bulkhead to separate the kitchen from the living area and help define the spaces.
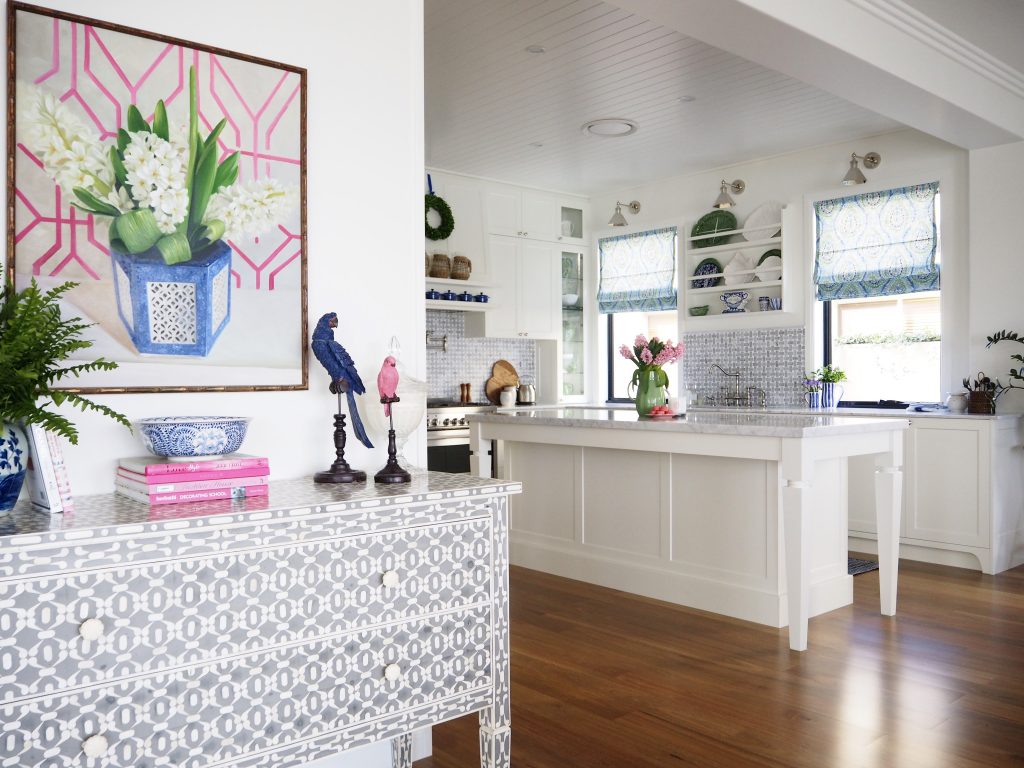
Another small thing we did that I think makes a huge difference was add architraves to the kitchen windows, they were previously square set with gyprock and I never liked them. We are re-doing them all as we work through the house.
Then it was pretty much a waiting game until the kitchen cabinetry went in.
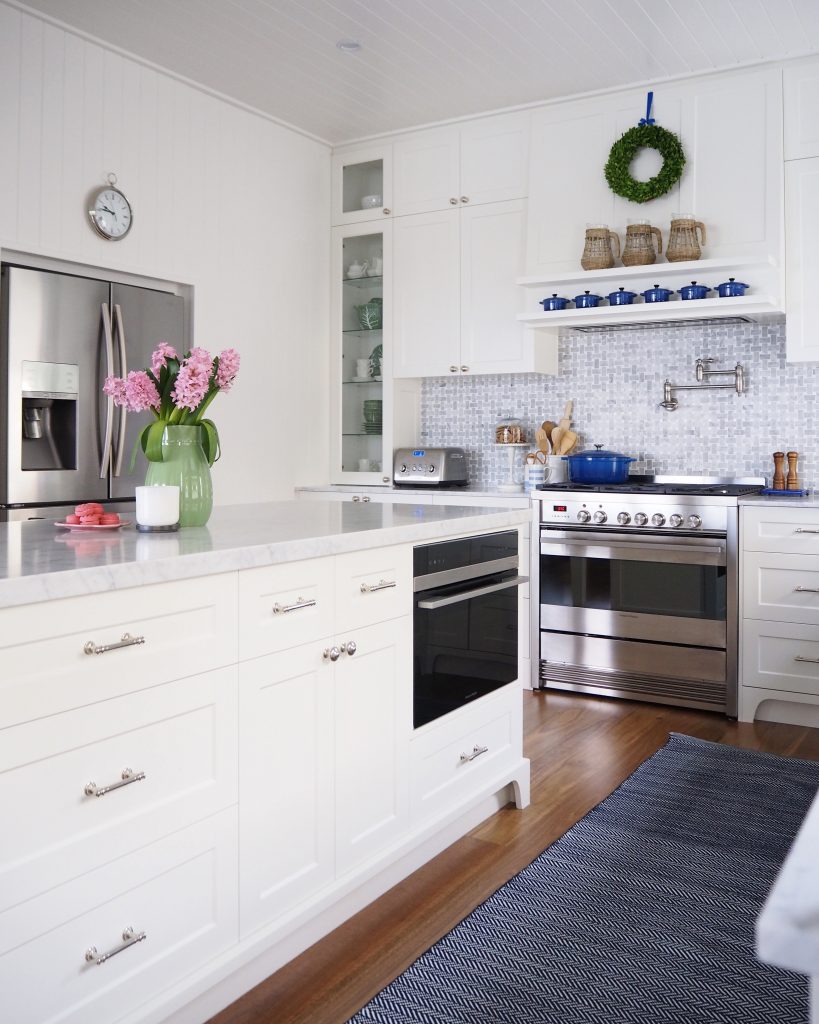
I chose a satin finish, shaker profile cabinet in a neutral white, it is timeless and works with many different styles. This profile is nothing new or exciting, it is used often and is probably one of the most popular styles right now, so I wanted to add a couple of custom made pieces to make my kitchen a little bit different.
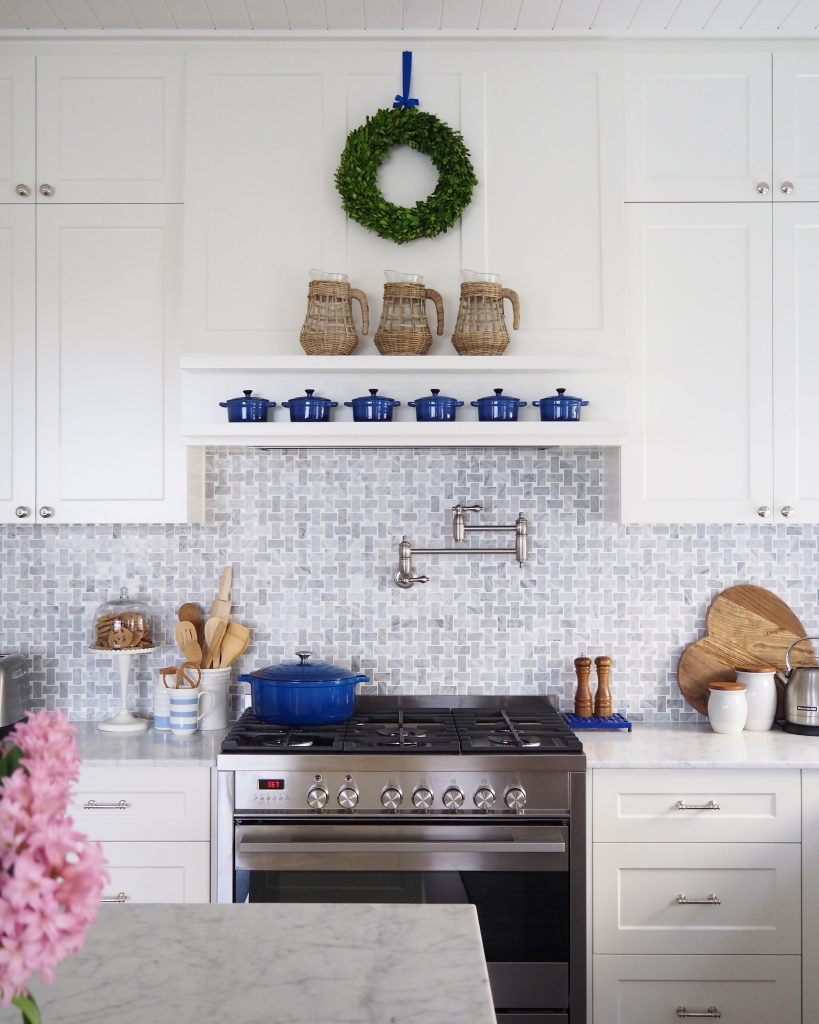
I had the rangehood made to my specification, and even though the 2 little shelves were actually a communication issue between myself and my cabinet maker and weren’t meant to be there, I actually loved them and told him not to change them. They are the perfect spot to display some pretty things .
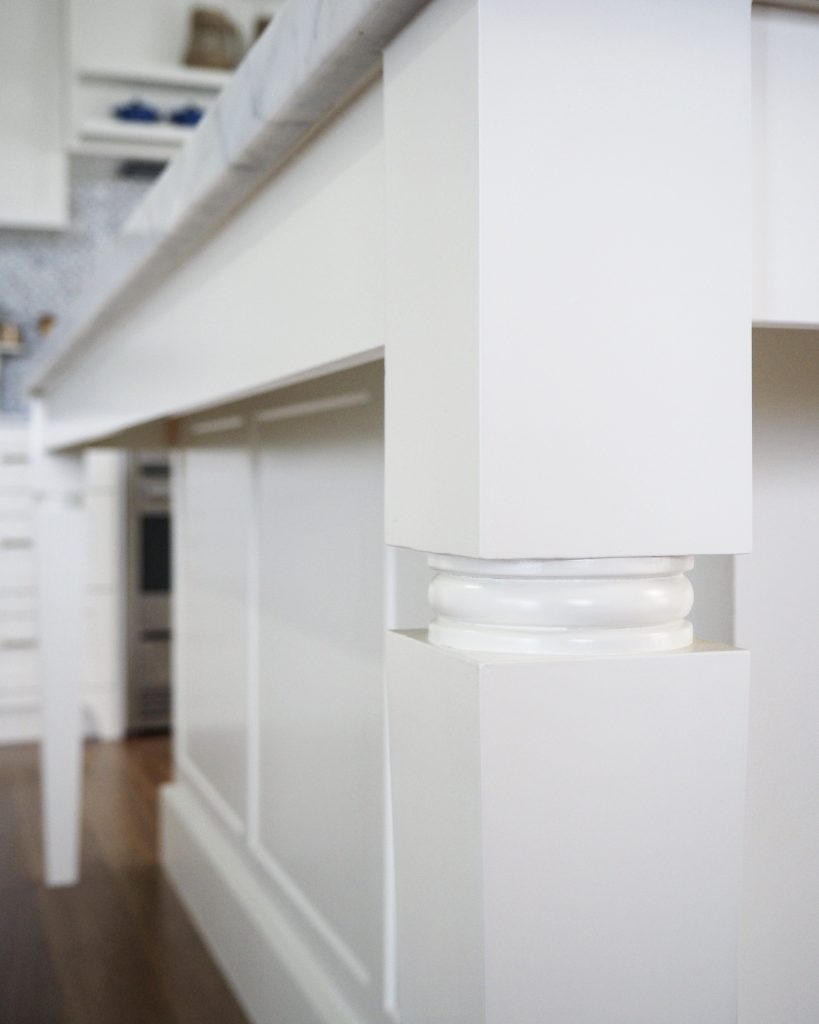
The other thing that was a little bit different to most kitchens was the legs on the island bench. I really wanted the island to look like a piece of furniture and I chose to have furniture legs put on the ends. They are not exactly what I had in mind, but they give the desired effect and I am happy with them.
There were a couple of hiccups during the process, but nothing ever goes smoothly when renovating and I’ve learnt to roll with the punches and make changes quickly.
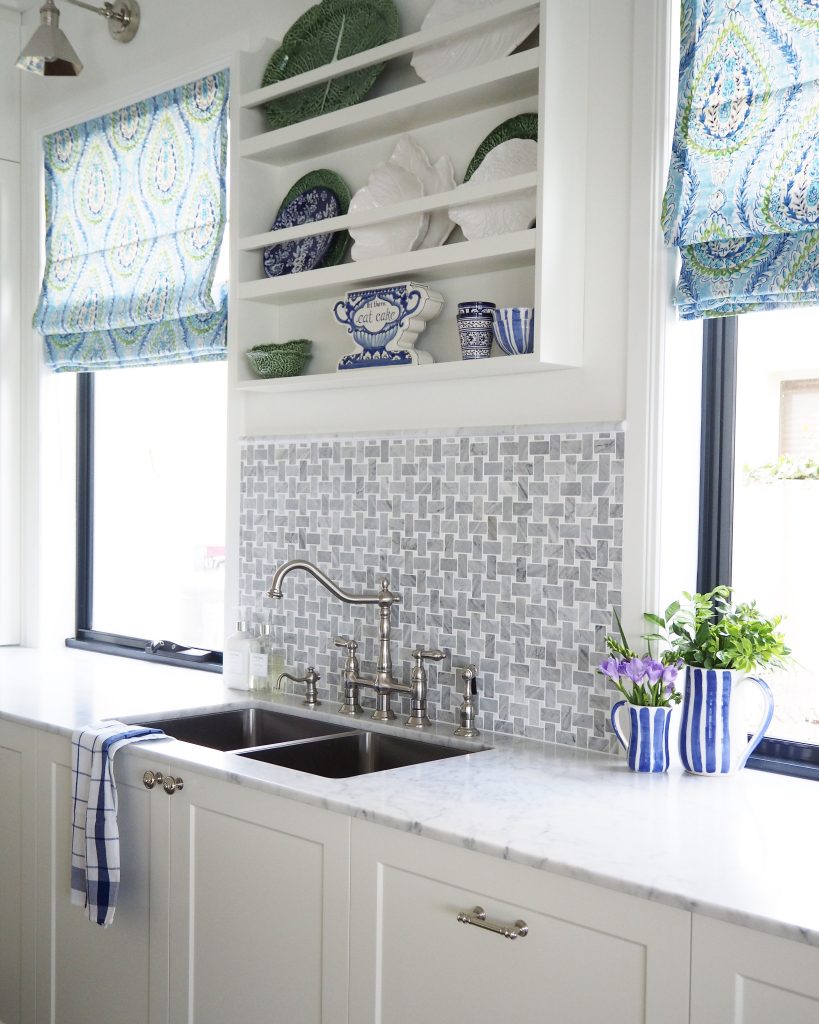
For example; I had intended on tiling the entire wall above my sink, from bench to ceiling and wall to wall. Unfortunately due to some wall issues we weren’t left with enough filler space where the upper cabinetry meets the wall where I wanted to tile. I had to re-think my plan and I just tiled 600mm high behind the sink. That left me with a large area of unused wall space. I didn’t want to put an overhead cabinet there as it would stick out too far and just look weird. I considered a piece of art and various other ideas, in the end I called my cabinet maker and asked if he could make a plate display rack for me to my specifications. I am so happy with it and it looks like it was part of the plan all along.
Once all the cabinetry was in the stone comes next. Again, we had a couple of issues but nothing that wasn’t fixed quickly by the fabulous stone masons.
Firstly I had decided on 30mm Super White Quartz for my outer benches and 40mm honed Carrara marble for the island bench. There was only a couple of pieces of Super White Quartz in the country and they were all 20mm and had fissures through them. A fissure is a natural cleft in the stone, it can break easily during the cutting process and the gap can widen over the years. The fissure is usually filled with a resin substance to prevent this. I chose to not take the risk and had to choose a new stone, on the spot, immediately, argh! I decided I love Carrara marble enough to use it all the way throughout my kitchen. I have used it before and I knew what I was getting myself into, but I’m so glad I did, I just adore the look and feel of the marble.
Secondly, the marble cracked during the installation process around the taps. The stone masons were awesome, they determined it as their fault and they replaced it with a new piece within a couple of days.
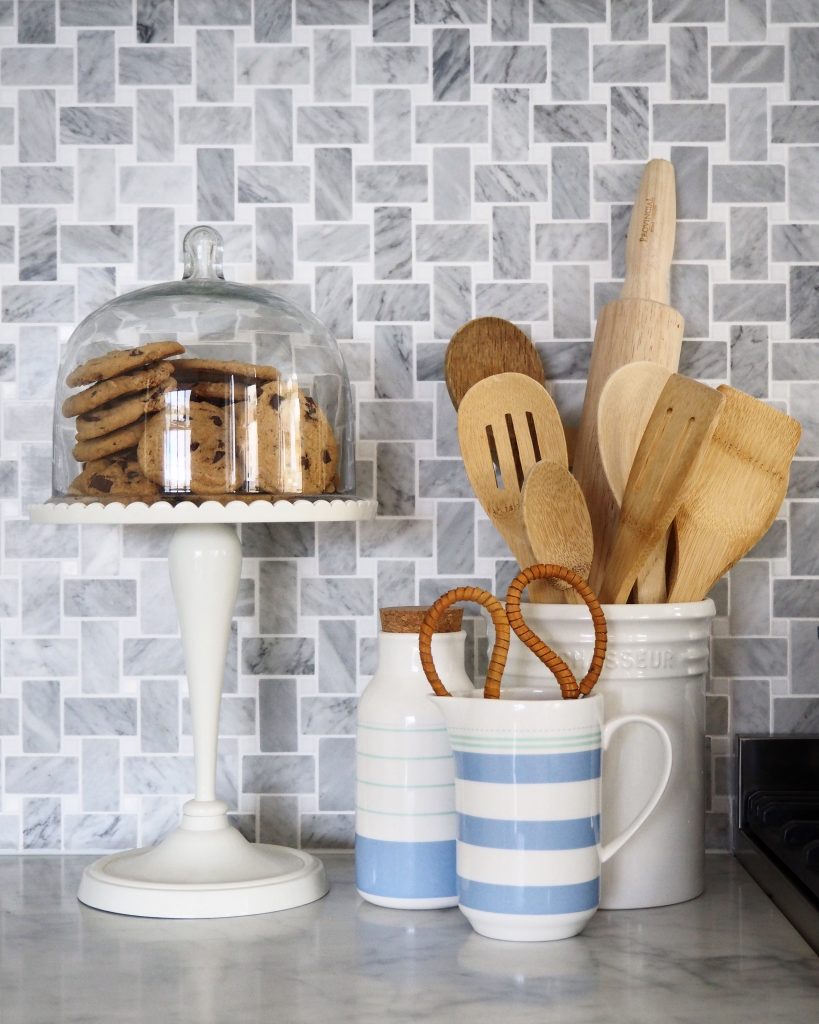
After the stone was the splash back tiles. I chose a basket weave Carrara marble. I have seen this tile used quite often with the black dot, I found it with the white dot and fell in love. I looks amazing up and I’m so happy with it.
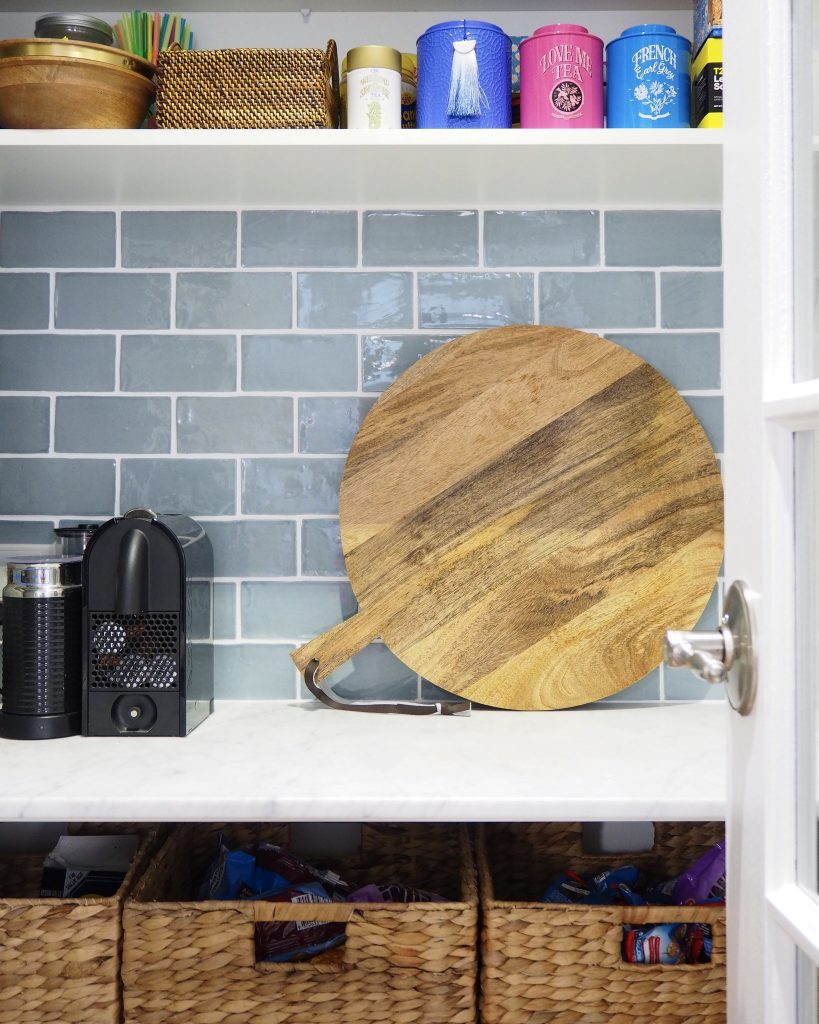
I used a duck egg blue handmade subway in the pantry, it was a less expensive option and I really loved it and wanted to use it somewhere, in fact I think I will use it in my laundry too.
Lastly, after the floors went down, all the appliances were installed.
I chose Fisher and Paykel for all my new appliances. We installed an upright electric/gas cooker, an integrated range, a combination oven/microwave and a double dish drawer.
The dishwasher drawers were a no brainer for me, as a family of five they are the perfect size to pop on after every meal. We never quite managed to fill a full size dishwasher after one meal and I always had dirty dished sitting in there waiting for the next meal to fill it and turn it on. I find we fill a drawer after every meal and turn it straight on, not leaving dirty dishes sitting there for hours. If you do happen to be extra messy or have people over for dinner, there is a second drawer to fill. We alternate between using the two drawers, partly because nobody ever wants to unpack it and partly to give them equal use.
The other thing that I really love is the combination microwave oven. It has 10 different cooking modes and works equally as well as a traditional oven or a microwave. We have already cooked meals, baked cakes and microwaved leftovers in it and it really is the hardest working little appliance in my kitchen. I highly recommend considering this instead of a standard microwave next time you are in the market.
The Jewellery …
I like to think of the cabinetry hardware and taps as pieces of jewellery, they add some bling and have the ability to make or break a kitchen. I think choosing the right pieces here is so important. These things can be really expensive and completely blow out your budget if you’re not careful, but if you hunt around you’ll be surprised at what you can find at affordable prices.
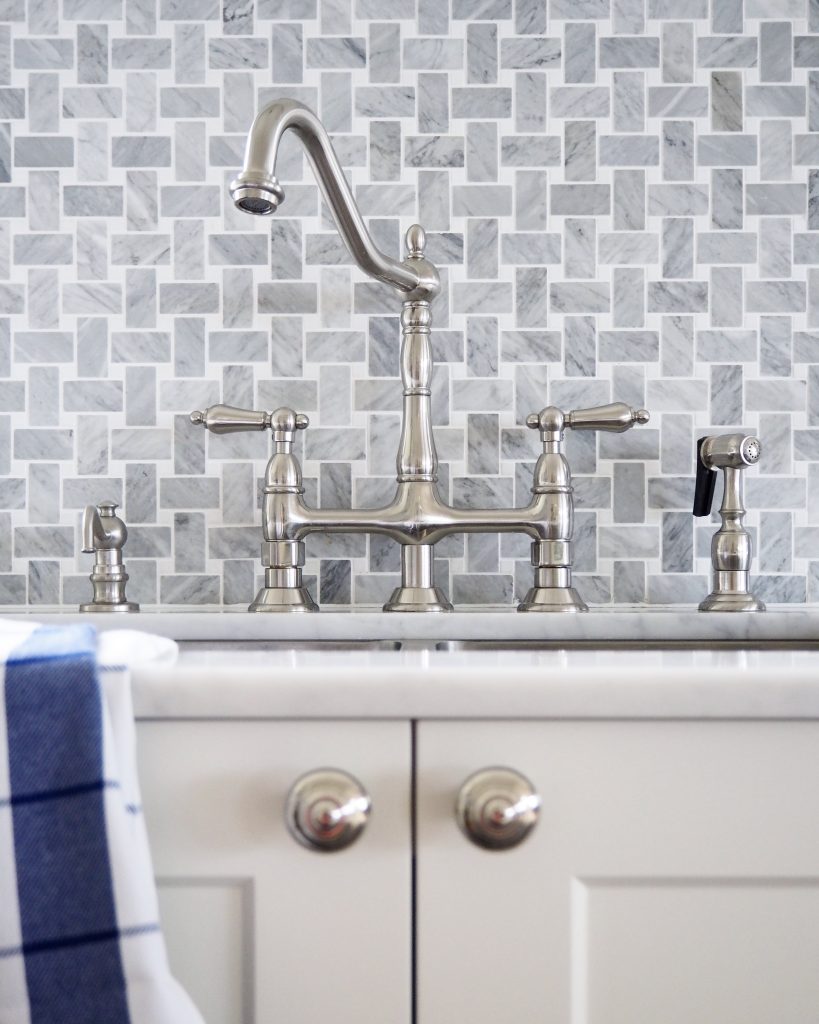
I had my heart set on an amazing tap that was over $4000, unfortunately this was not at all in the budget so I went hunting and found another one that is very similar for under $500. As much as I like to shop locally, sometimes we just don’t have the options in Australia and you need to look overseas. I bought my tap ware in America from Kingston Brass in a satin nickel finish. I love the bridge style and feminine shape.
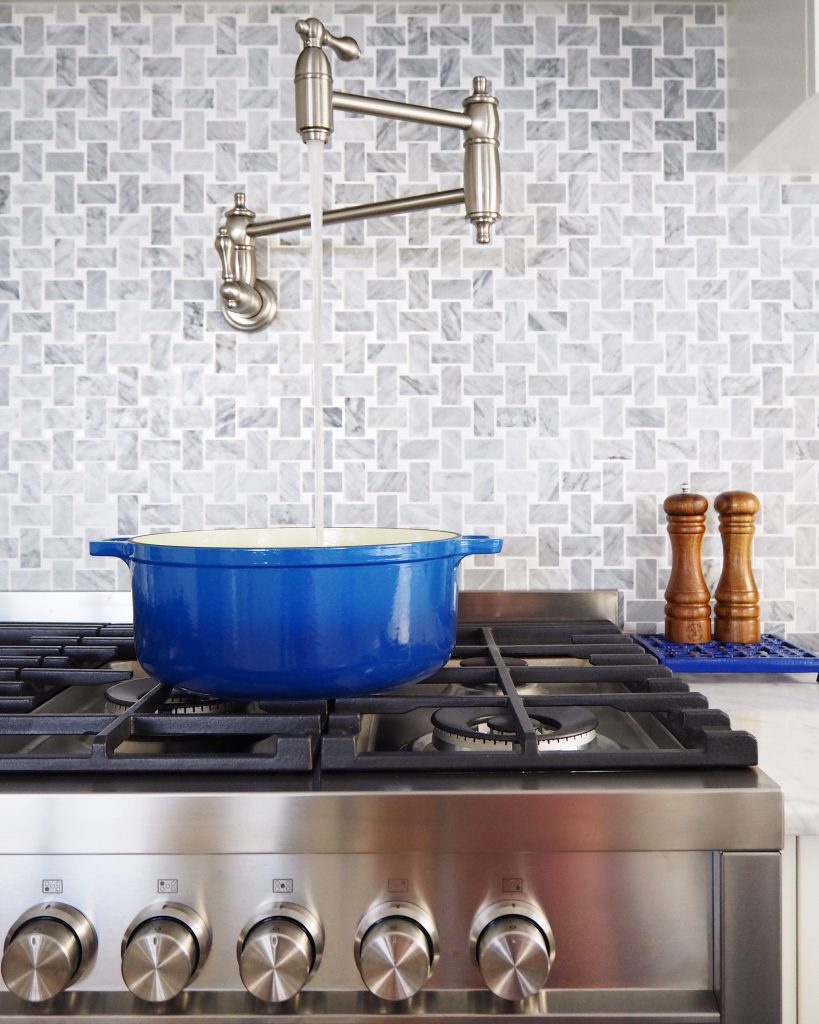
I also decided to use a pot filler tap which has ended up being one of my favourite things in the kitchen. They are not very common in Australia, although they are popping up more and more lately, but are used often in America and Europe. As the name suggests, they are just a tap to fill your pots on the stove without having to carry them back and forth to the sink. As well as being so handy, it looks pretty and is an extra piece of ‘jewellery’ on an otherwise blank wall.
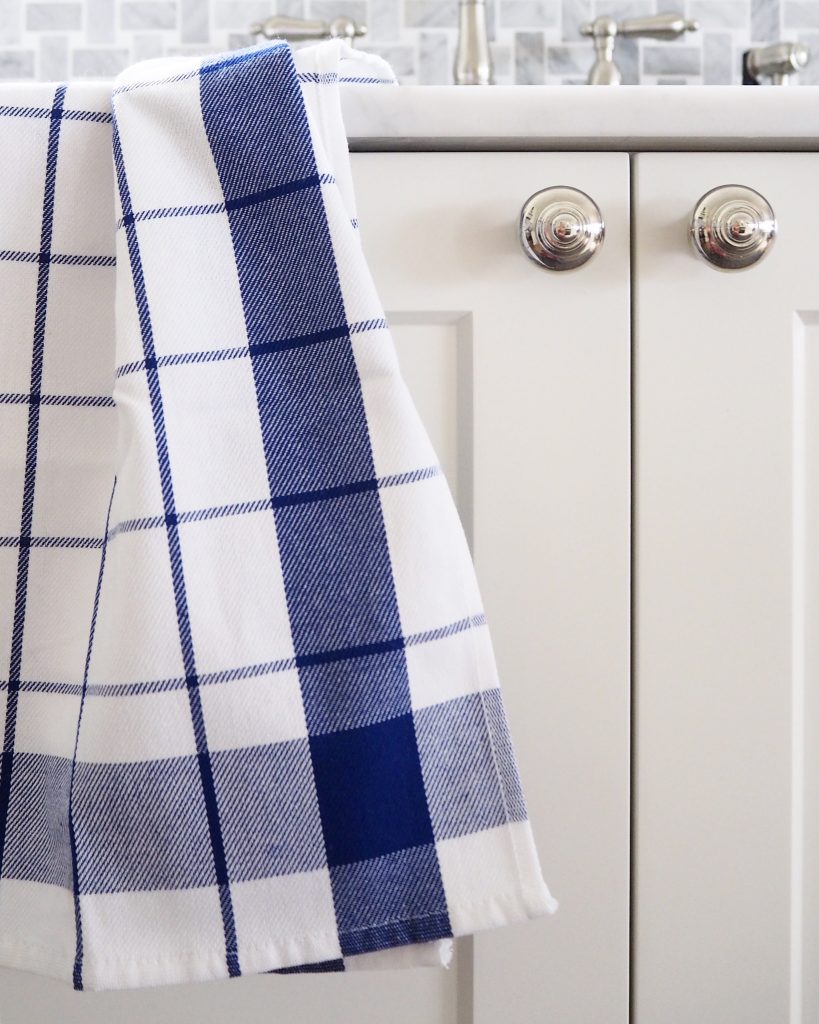
My hardware is all polished nickel and I bought it from Home Depot while I was in Hawaii on holiday. That is dedication to my kitchen right there, do you know how heavy they were, I could have brought home an extra 6 pairs of shoes in my luggage!
And lastly, my wall sconces, which I absolutely adore!
I couldn’t use a chandelier or pendants in my kitchen because nothing lines up. If I did them over the island bench they would be off centre for the rangehood, and vice versa. So I decided to use wall sconces over the windows and over the pantry door. They are polished nickel in a classic design and they bring a little bit of sparkle to all the hard finishes.
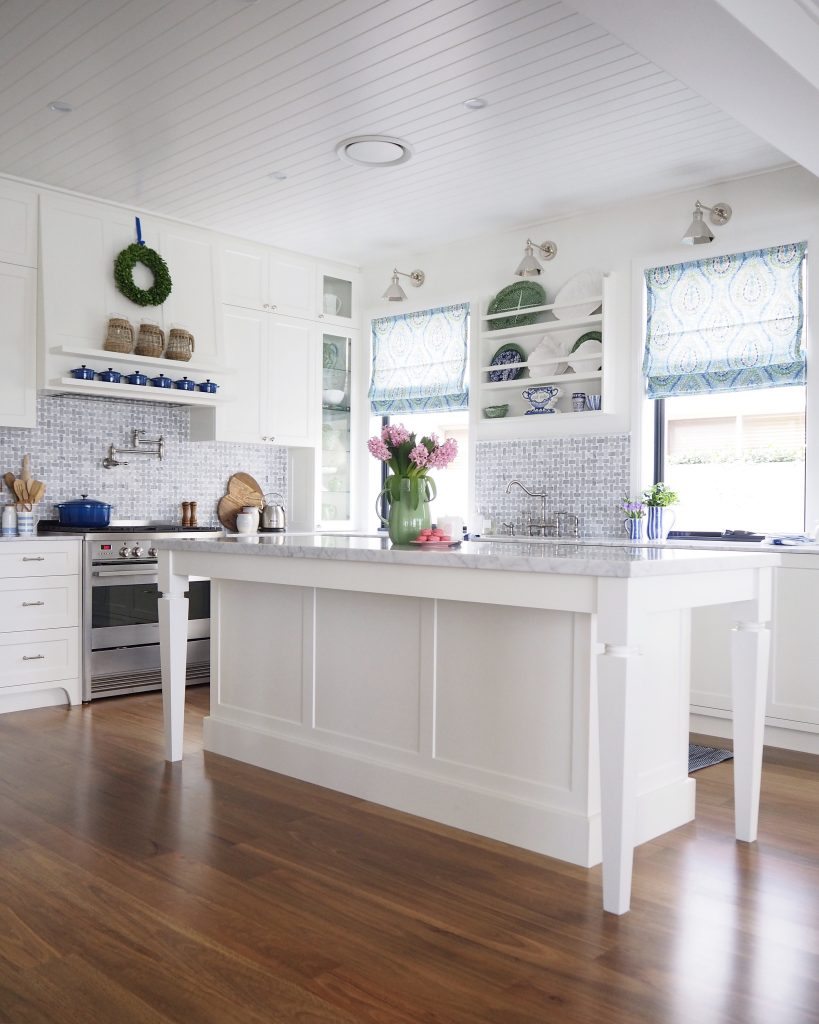
Then FINALLY I had a functional kitchen, yay!
If you want to see more photos of the mess during the process, pop over to Instagram and search the hashtag #thelittlerenovation
In the next post I’ll chat about all the styling and pretty pieces that make my kitchen ‘mine’.
If there is a detail or product that you’d like to know more about, please leave a comment or e-mail me and I’ll get back to you ASAP.
Hayley x
***A big thank-you to Ellie from Flowerhaul for sourcing the most perfect pink hyacinths for my photo’s, they are stunning!
THE DETAILS
Paint Colour for walls and trim – Dulux Natural White / Inspirations Paint
Cabinetry – Shaker profile, 30% satin finsh, Dulux Natural White / MG Cabinetry
Benchtops – Honed Carrara marble, 20mm on edges, 40mm on island bench / La Rocca Marble and Granite
Kitchen Tiles – Basketweave Carrara marble with white dots / Tile and Stone
Pantry Tiles – Duck Egg Blue handmade subway / Tile and Stone
Freestanding Cooker – Pyrolytic Duel Fire OR90SDBGFPX1 / Fisher and Paykel
Combination Microwave Oven -OM36NDXB1 / Fisher and Paykel
Rangehood -HP90IDCHX2 / Fisher and Paykel
DishDrawers – Integrated double DishDrawer DD60DI7 / Fisher and Paykel
Sink Tap – Heritage satin nickel bridge mount tap, with vegetable sprayer / Kingston Brass
Pot Filler – Swing arm wall mount pot filler / Kingston Brass
Soap Dispenser – Vintage satin nickel / Kingston Brass
Cabinetry Hardware – Martha Stewart from Home Depot
Wall Sconces – Mayfair in shiny nickel / Emac & Lawton
I can’t believe the amazing transformation you made Hayley. It looks incredible….such a proud mummy am i❤️❤️❤️
This was such a great read Hayley… so many tios and tricks ive noted as we are looking at a renovation ourselves. Thank you for your amazing blog. X
Thanks Ruth, it always makes me happy to hear that people enjoy reading my babble. I truly appreciate it! Hx
Hayley, I love your kitchen transformation and am looking to do something very similar. I live locally and was hoping you might share with me the name of your cabinet maker. Love reading your blog!
Thanks so much, I’m so pleased with it!
I used Matt from MG Cabinetry and he was wonderful!
Hx
Hi Hayley,
Thank you for sharing your design. Absolutely amazing! I am also doing renovation of my kitchen with natural white joinery. Would like to know what kind of timber flooring you used?
Thank you.
Hi, thanks for stopping by! We used spotted gum engineered timber from Godfrey Hurst and we were really happy with it.